Laptop Digital Picture Frame
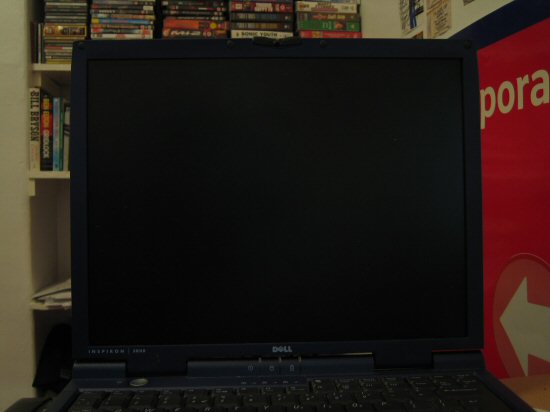
I managed to get my hands on an old Dell Inspiron 3800 laptop and, after spending a day or so fiddling with it, I finally decided it had no use as a laptop. The laptop was useless for a number of reasons: The battery didn’t work, it had a single USB 1.1 port and only 64MB of RAM. Now, I know I could have bought some more RAM, but considering it takes 144-pin modules it was something I wasn’t prepared to buy.
So what now? There was only one way to go. Turning your old laptop into a digital picture frame seems rather popular at the moment and since Christmas is on its way, I thought I’d give it a go myself.
The Software
I apologise now. The laptop runs Windows XP. I know that for it to be at all reputable I shouldn’t have done that, but after playing with a number of Linux distributions and not being happy with any, it was a lot quicker to get XP running. If I’d had more time then I would have done the job properly but as I said, Christmas was closing in!
For obvious reasons I wanted the picture frame to be controlled from another machine on the network, so the first thing to be installed was Apache. Again, for quick setup I decided to install trusty old PHPDev, which I’d had lying around for ages. True, it’s not very secure, and using an old installer meant I got rather outdated versions of Apache and PHP, but the out-of-the-box setup was good enough for me.
I wanted the picture frame to show pictures from a specific network location if it was available — my parents have a network drive with all their pictures on it — so I messed around with showing pictures in a Flash slideshow that I’d made for our Media Center screensaver. The RAM stick reared its ugly head again; the cross fade in the slideshow was very jerky, so the Flash idea was ditched.
The next option was to write a program that would flip through random photographs on a network drive, but after revisiting Christoffer Järnåker’s write-up I went for IrfanView to produce the slideshows. Success! Cross fading was back!
IrfanView also features a lot of nice command-line options that meant I could control it using PHP’s exec() function. Or so I thought.
With Apache running as a service, I could either run it as LocalSystem and allow it to interact with the desktop, or give it network privileges. Not both. I decided to give Apache the network privileges it required and work out some sort of message-passing system to start the slideshows on the desktop.
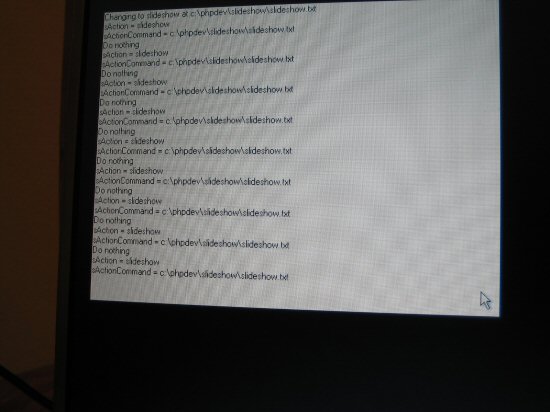
The rather clunky but strangely satisfying method I went for was this: a PHP script output a text file containing paths to images that should be shown in the slideshow, and then updates a configuration file with instructions to execute the new slideshow. A constantly running VB program checks the config file and sends Shell() commands to IrfanView accordingly. Phew!
The Code
Here’s the code for the VB program (I’ve neglected to include the module that handles the forced shutdown of the laptop):
Option Explicit

Private Declare Function GetLogicalDriveStrings Lib "kernel32" Alias _
    "GetLogicalDriveStringsA" (ByVal nBufferLength As Long, _
    ByVal lpBuffer As String) As Long

Const bDebug = False

Dim sIrfanPath As String
Dim sDebugFlashDrive As String
Dim sNoDebugFlashDrive As String
Dim sFlashDrive As String
Dim sHandlerPath As String
Dim sTestImagePath As String
Dim sFlashSlideshowPath As String
Dim sDefaultImagesPath As String

Dim sSettingsDate As String
Dim bDeleteFile As Boolean
Dim bInDefault As Boolean
Dim bUpdate As Boolean
Dim sAction As String
Dim sActionCommand As String
Dim fTestImage As File

Private Sub Form_Click()
    End
End Sub

Private Sub Form_Load()
    Dim lFileHandle As Long

    lFileHandle = FreeFile()
    Open App.Path & "\settings.ini" For Input As lFileHandle
    Line Input #lFileHandle, sIrfanPath
    Line Input #lFileHandle, sDebugFlashDrive
    Line Input #lFileHandle, sNoDebugFlashDrive
    Line Input #lFileHandle, sHandlerPath
    Line Input #lFileHandle, sTestImagePath
    Line Input #lFileHandle, sFlashSlideshowPath
    Line Input #lFileHandle, sDefaultImagesPath
    Close #lFileHandle

    sIrfanPath = Trim(sIrfanPath) & " "
    sHandlerPath = App.Path & "\" & sHandlerPath
    sTestImagePath = App.Path & "\" & sTestImagePath
    sFlashSlideshowPath = App.Path & "\" & sFlashSlideshowPath
    sDefaultImagesPath = App.Path & "\" & sDefaultImagesPath

    sFlashDrive = IIf(bDebug, sDebugFlashDrive, sNoDebugFlashDrive)
    If bDebug Then
        Me.Visible = True
        Me.BackColor = vbWhite
        Me.Width = Screen.Width / 2
        Me.Height = Screen.Height / 2
    End If

    Dim oFSO As Object, fFolder As Folder, fSubfolder As Folder, fFile As File
    Set oFSO = CreateObject("Scripting.FileSystemObject")
    Set fTestImage = oFSO.GetFile(sTestImagePath)
    bDeleteFile = False
End Sub

Private Sub tmrPause_Timer()
    Dim sNewSettingsDate As String, sNewAction As String, sNewActionCommand As String
    Dim lFileHandle As Long, bManualChange As Boolean
    bManualChange = False
    bUpdate = True

    If DriveExists(sFlashDrive) Then 'should show some flash drive stuff
        If sActionCommand <> sFlashSlideshowPath Then
            bManualChange = True
            bInDefault = False
            CreateFlashDriveSlideshow
        End If
        sNewAction = "flash"
        sNewActionCommand = sFlashSlideshowPath

    ElseIf DriveExists("Z") Then 'should show networked stuff
        If FileExists(sHandlerPath) Then

            sNewSettingsDate = FileDateTime(sHandlerPath)

            If (bInDefault Or sNewSettingsDate <> sSettingsDate) _
              And sNewSettingsDate <> vbNullString _
              And FileLen(sHandlerPath) > 0 Then
                lFileHandle = FreeFile()
                bInDefault = False

                Open sHandlerPath For Input As lFileHandle
                Line Input #lFileHandle, sNewAction
                Line Input #lFileHandle, sNewActionCommand
                Close #lFileHandle
            End If

        Else
            If sActionCommand <> sDefaultImagesPath Then
                bManualChange = True
            End If
            sNewAction = "default"
            sNewActionCommand = sDefaultImagesPath
            bInDefault = True
        End If

    Else 'should do some default stuff
        If sActionCommand <> sDefaultImagesPath Then
            bManualChange = True
        End If
        sNewAction = "default"
        sNewActionCommand = sDefaultImagesPath
        bInDefault = True
    End If

    If bDeleteFile Then DeleteFile sActionCommand

    If sNewSettingsDate <> sSettingsDate Or bManualChange Then
        Select Case sNewAction
            Case "slideshow", "flash", "default"
                bDeleteFile = False

                If bDebug Then
                    Print "Changing to slideshow at " & sNewActionCommand
                Else
                    Shell sIrfanPath & "/killmesoftly"
                    Shell sIrfanPath & "/slideshow=" & sNewActionCommand
                End If
            Case "single"
                RestorePreviousHandler

                bDeleteFile = True
                If FileLen(sNewActionCommand) > 0 Then
                    If bDebug Then
                        Print "Changing to uploaded image at " & sNewActionCommand
                    Else
                        Shell sIrfanPath & "/killmesoftly"
                        Shell sIrfanPath & sNewActionCommand
                    End If
                End If
            Case "delay"
                tmrPause.Interval = (CInt(sActionCommand)) * 1000

                If bDebug Then Print "Changing timer interval to " _
                    & (CInt(sActionCommand)) * 1000
            Case "kill"
                RestorePreviousHandler
                Shell sIrfanPath & "/killmesoftly"
                End

            Case "shutdown"
                RestorePreviousHandler

                If bDebug Then
                    Print "Shutting down"
                Else
                    Shell sIrfanPath & "/killmesoftly"
                    ShutdownSystem EWX_FORCESHUTDOWN
                End If
        End Select
    Else
        If bDebug Then Print "Do nothing"
        bUpdate = False
    End If

    If bUpdate Then
        sAction = sNewAction
        sActionCommand = sNewActionCommand
    End If
    If FileExists(sHandlerPath) Then sSettingsDate = sNewSettingsDate
End Sub

Sub DeleteFile(sPathName As String) 'deletes given file
    If FileExists(sPathName) Then
        Dim oFSO As Object
        Set oFSO = CreateObject("Scripting.FileSystemObject")
        oFSO.DeleteFile sPathName 'delete the file
    End If
End Sub

Function DriveExists(ByVal sDrive As String) As Boolean
    Dim buffer As String
    buffer = Space(64)
    ' return False if invalid argument
    If Len(sDrive) = 0 Then Exit Function
    ' get the string that contains all drives
    GetLogicalDriveStrings Len(buffer), buffer
    ' check that the letter we're looking for is there
    DriveExists = InStr(1, buffer, Left$(sDrive, 1), vbTextCompare)
End Function

Function FileExists(sPathName As String) As Boolean ' checks if a file exists
    If Len(sPathName) > 0 Then ' checks filename entered
        ' dir function returns directory if file exists
        FileExists = (Len(Dir(sPathName)) > 0)
    Else: FileExists = False
    End If
End Function

Sub CreateFlashDriveSlideshow()
    Dim lFileHandle As Long
    lFileHandle = FreeFile()

    Open sFlashSlideshowPath For Output As lFileHandle
    ParseFolder sFlashDrive, lFileHandle
    Close #lFileHandle
End Sub

Sub ParseFolder(sFolder As String, lFileHandle As Long)
    Dim oFSO As Object, fFolder As Folder, fSubfolder As Folder, fFile As File
    Set oFSO = CreateObject("Scripting.FileSystemObject")
    Set fFolder = oFSO.GetFolder(sFolder)

    For Each fSubfolder In fFolder.SubFolders
        ParseFolder fSubfolder.Path, lFileHandle
    Next fSubfolder

    For Each fFile In fFolder.Files
        If fFile.Type = fTestImage.Type Then
            Print #lFileHandle, fFile.Path
        End If
    Next fFile
End Sub

Sub RestorePreviousHandler()
    Dim lFileHandle As Long

    lFileHandle = FreeFile()
    Open sHandlerPath For Output As lFileHandle
    Print #lFileHandle, sAction
    Print #lFileHandle, sActionCommand
    Close #lFileHandle
End Sub
I left in the debugging mode just in case I needed to make some changes later on. All the program constants are loaded in from another configuration file, hopefully meaning minimal recompilation.
In addition to the VB handler, I needed to set IrfanView up to show everything correctly. I wanted the images to be displayed randomly, the slideshow to be full-screen and the cursor to be hidden.
To summarise the software, the picture frame will show photographs at random from a pre-determined network location, unless none are available, in which case it defaults to a small collection of images on the hard drive. If someone inserts a USB flash drive containing images, then the current slideshow is exited and the images from the flash drive are displayed randomly until it is removed, at which point the picture frame resumes the previous slideshow. Using the Web interface, a single image can be uploaded to the picture frame that will be displayed for one cycle before returning to the previous slideshow. At the last minute I decided to enable remote desktop if anything should go wrong.
To summarise the summary: I’m very happy with the software!
The Disassembly
I don’t need most of what’s provided in this laptop unit. I don’t want the battery or CD-ROM drive, the keyboard or mouse pad, or any of the casing. All I need is the screen, the hard drive and the stripped-down motherboard.
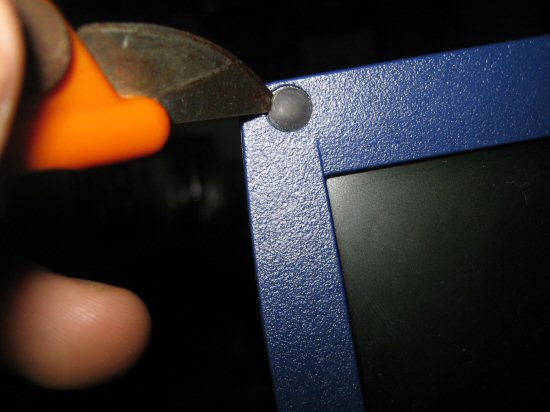
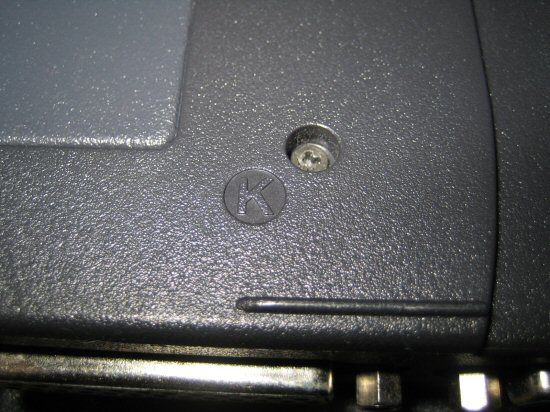
I started with the screen. All the screws on my display unit are located under rubber covers; however they’re just glued down so they prise straight out. After removing those, I flipped over the laptop and removed the screws holding in the keyboard (these are nicely labelled “K” on many Dell laptops) and the display (marked “D”) before turning it back over and pulling the screen away from the main assembly.
I moved the keyboard out of the way so I could get to the connector for the screen. These connectors are rather sturdy but it’s still not advisable to pull the cable — attempt to gently rock the connector out.
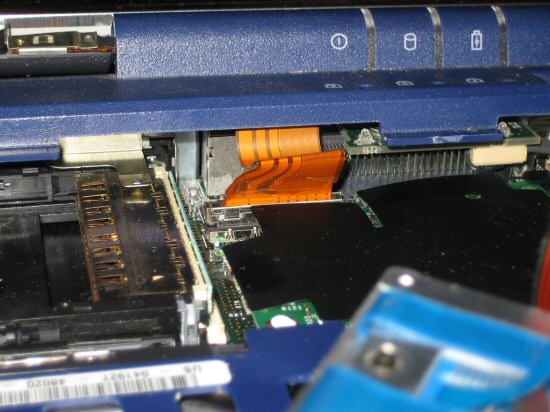
With the screen loose I could remove it from the lid. I then set about removing unwanted components from the motherboard. I actually left the keyboard connected until the very end, thinking that I’d need it for the laptop to start properly. It wasn’t needed, so it was removed later on. I found the connecting cable was very stiff but precision brute force saved the day.
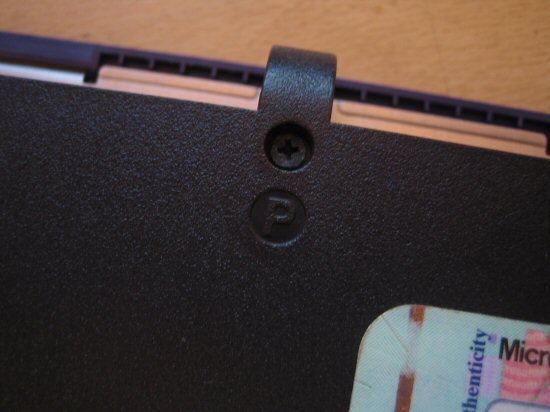
The rest of the components were hidden under the casing, so I removed the rest of the screws (Marked “P”) and dispensed with it. A few more screws and the COM ports held the metal tray to the motherboard; these were also removed. I had to temporarily remove the cover of the CPU to get one of the screws holding in the heat sink.
At this point, I decided a test was in order to see if everything was working. The laptop booted cleanly to the default slide show (with no network card).
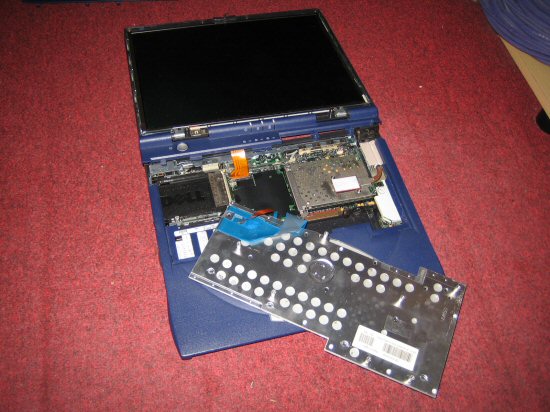
The next part was to remove the track pad print layout from its metal frame. It was glued on rather well, but a sharp knife separated the two nicely. This also includes the speakers, which I don’t really want, so they were removed.
I decided to give it one last test, but somehow I managed to forget to hook up the keyboard and mouse. To my surprise, it booted fine, so I removed the keyboard and mouse completely, saving precious space behind the frame. Now the only connected devices are the PCMCIA slots and the hard drive.

The Reassembly
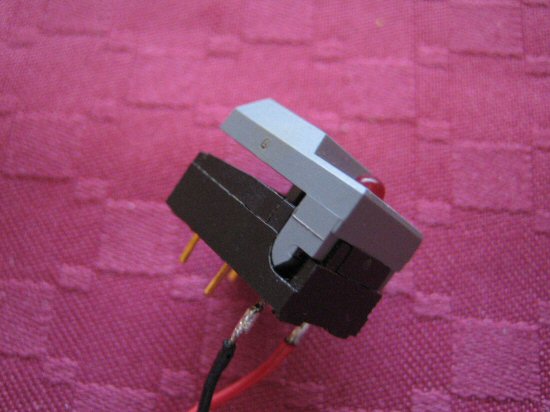
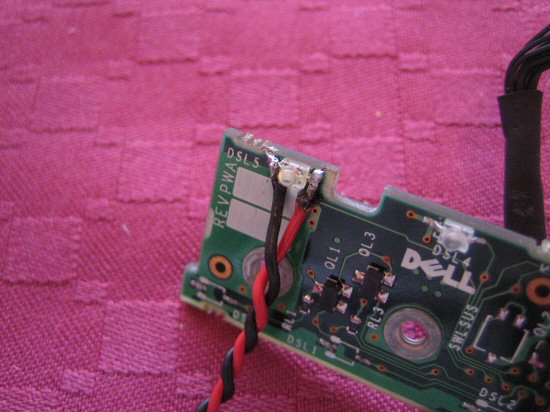
The power button is a push-to-make switch with a built-in LED that comes on when the laptop is switched on.
The power button needed extending so it could be built into the frame. At first I used one of the buttons from the print layout, but then I found a nice button with a built-in LED, so I hooked that up to the laptop’s power LED.
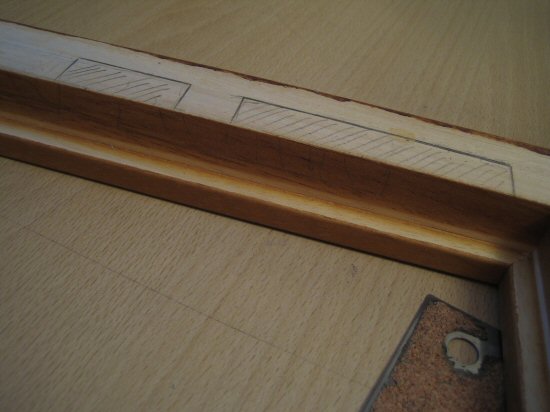
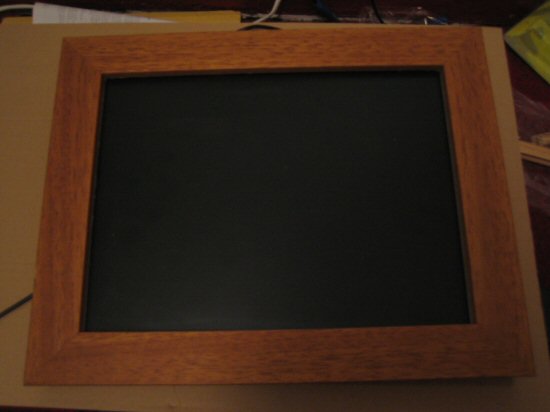
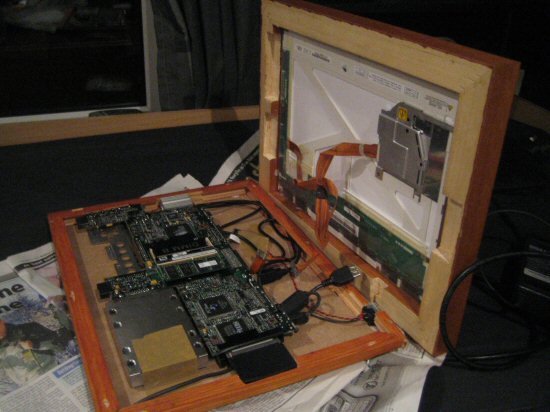
The frame required a bit of cutting to get the laptop to fit in — the biggest problem was the wireless PCMCIA card sticking out from the side of the motherboard, but a little cutting into the (thankfully soft) frame and it fitted. However the bit stuck out from the back of the frame about 8mm — a couple of lengths of wood sorted this out. I applied a couple of coats of wood stain to the spacers to match the frame colour.
To finish, the spacers were glued to the backboard (to which the motherboard is affixed) and the back was screwed to the frame. I’m quite happy with the finished result; Sometimes the laptop struggles to connect to the network drive, but that’s OK since it defaults back to showing some pictures on the hard drive anyway.
The Finished Product
The total cost of this project was around £30 for a wireless card and a frame, only slightly helped by what I had lying around the house. The laptop was free, but you can pick them up for very little money from eBay. You don’t even need a working hard drive, as many other projects have demonstrated — you can boot from a CD-ROM, which would also make the project a lot quieter.
This is a really fun project that got me doing a bit of coding, a bit of woodworking and a bit of taking things apart to see how they work — all were thoroughly enjoyable and I’d recommend giving one of these projects a go. It took me a day to fully set up the laptop and code the software, then an afternoon to take it apart and a couple of evenings to construct the frame. And, like everyone says, if you do attempt one of these, take pictures!
You can also view more pictures of the project.
Leave a Reply